Cozy Weekend Teriyaki Chicken Skillet with Sticky Aromas
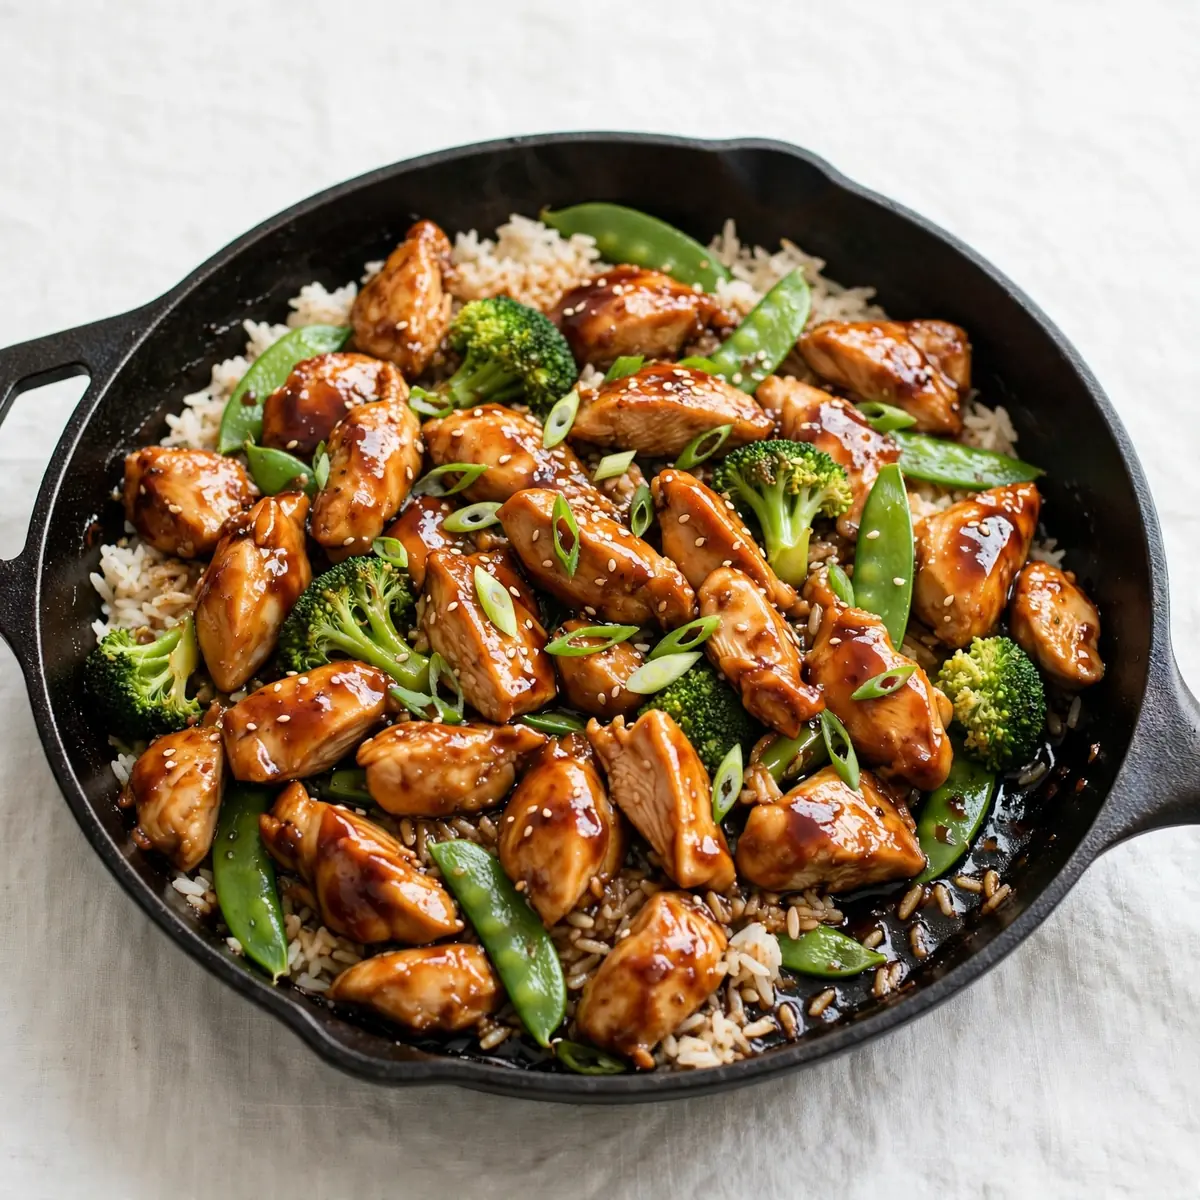
There are some meals that demand your full attention, but this one rewards you by filling your kitchen with the deepest, most savoury aromas of soy and ginger while you potter about on a lazy weekend. This Quick Teriyaki Chicken Skillet is my favourite cosy weekend project, a dish that feels like a proper treat without needing hours of fussing.
Recipe Overview
- Prep Time: 15 minutes
- Cook Time: 20 minutes
- Total Time: 35 minutes
- Servings: 4
- Difficulty: Easy
Why You’ll Love This Quick Teriyaki Chicken Skillet
- Deep, authentic flavour in one pan: The sauce reduces into a glossy, sticky glaze that clings beautifully to every piece of chicken, giving you that restaurant-quality finish at home.
- Perfect for a slow weekend rhythm: While the recipe is quick, the process of slicing, stirring, and watching the sauce bubble is wonderfully meditative — ideal for unwinding.
- No obscure ingredients needed: Everything comes from a standard supermarket shop, so you can decide to make this on a whim without a special trip.
- Naturally adaptable for different diets: It is simple to swap the protein or add extra vegetables, making it a versatile staple for any household.
- Leaves you with minimal washing up: Just one skillet and a few bowls means more time curled up on the sofa afterwards.
Ingredients You’ll Need
- 600 g boneless, skinless chicken thighs
- 4 tablespoons soy sauce (use tamari for gluten-free)
- 3 tablespoons honey
- 2 tablespoons rice vinegar
- 2 cloves garlic, finely minced
- 1 tablespoon fresh ginger, grated
- 1 tablespoon cornflour
- 100 ml chicken stock
- 2 tablespoons vegetable oil
- 1 spring onion, sliced thinly for garnish
- 1 teaspoon sesame seeds, toasted
- Steamed jasmine rice, to serve
Tip: For the most tender result, use chicken thighs rather than breasts. The extra fat keeps the meat succulent during the high-heat cooking, and the flavour is noticeably richer.
How to Make Quick Teriyaki Chicken Skillet
- Prepare the chicken: Pat the chicken thighs dry with kitchen paper, then slice them into bite-sized chunks, about 3 cm each. You want them uniform so they cook evenly. The raw chicken should feel cool and slightly damp in your hands, but the paper removes excess moisture that would stop it browning.
- Mix the teriyaki sauce: In a small bowl, whisk together the soy sauce, honey, rice vinegar, minced garlic, grated ginger, cornflour, and chicken stock. Whisk until the cornflour dissolves completely — you should see no white specks left. The liquid will be a translucent, amber-brown colour with the honey swirling through it.
- Heat the skillet: Place your large frying pan or skillet over a medium-high heat and add the vegetable oil. Wait until the oil shimmers and a small piece of onion sizzles immediately when dropped in. This takes about 2 minutes.
- Sear the chicken: Add the chicken pieces in a single layer — do not crowd the pan, cook in two batches if needed. Leave them undisturbed for 3 minutes. You will hear a steady, satisfying hiss as the meat hits the hot oil. The underside should turn a deep golden brown with crispy edges before you flip them.
- Brown all sides: Turn each piece with tongs and cook for another 3 minutes. The chicken should feel firm to the touch and have a rich, roasted aroma filling your kitchen. The surfaces will be caramelised in patches, smelling nutty and savoury.
- Add the sauce: Pour the teriyaki mixture into the skillet around the chicken, not directly over it, to avoid splashing. Stir gently to coat every piece. The sauce will immediately start to bubble and thicken, releasing a sweet-savoury steam that smells intensely of ginger and garlic.
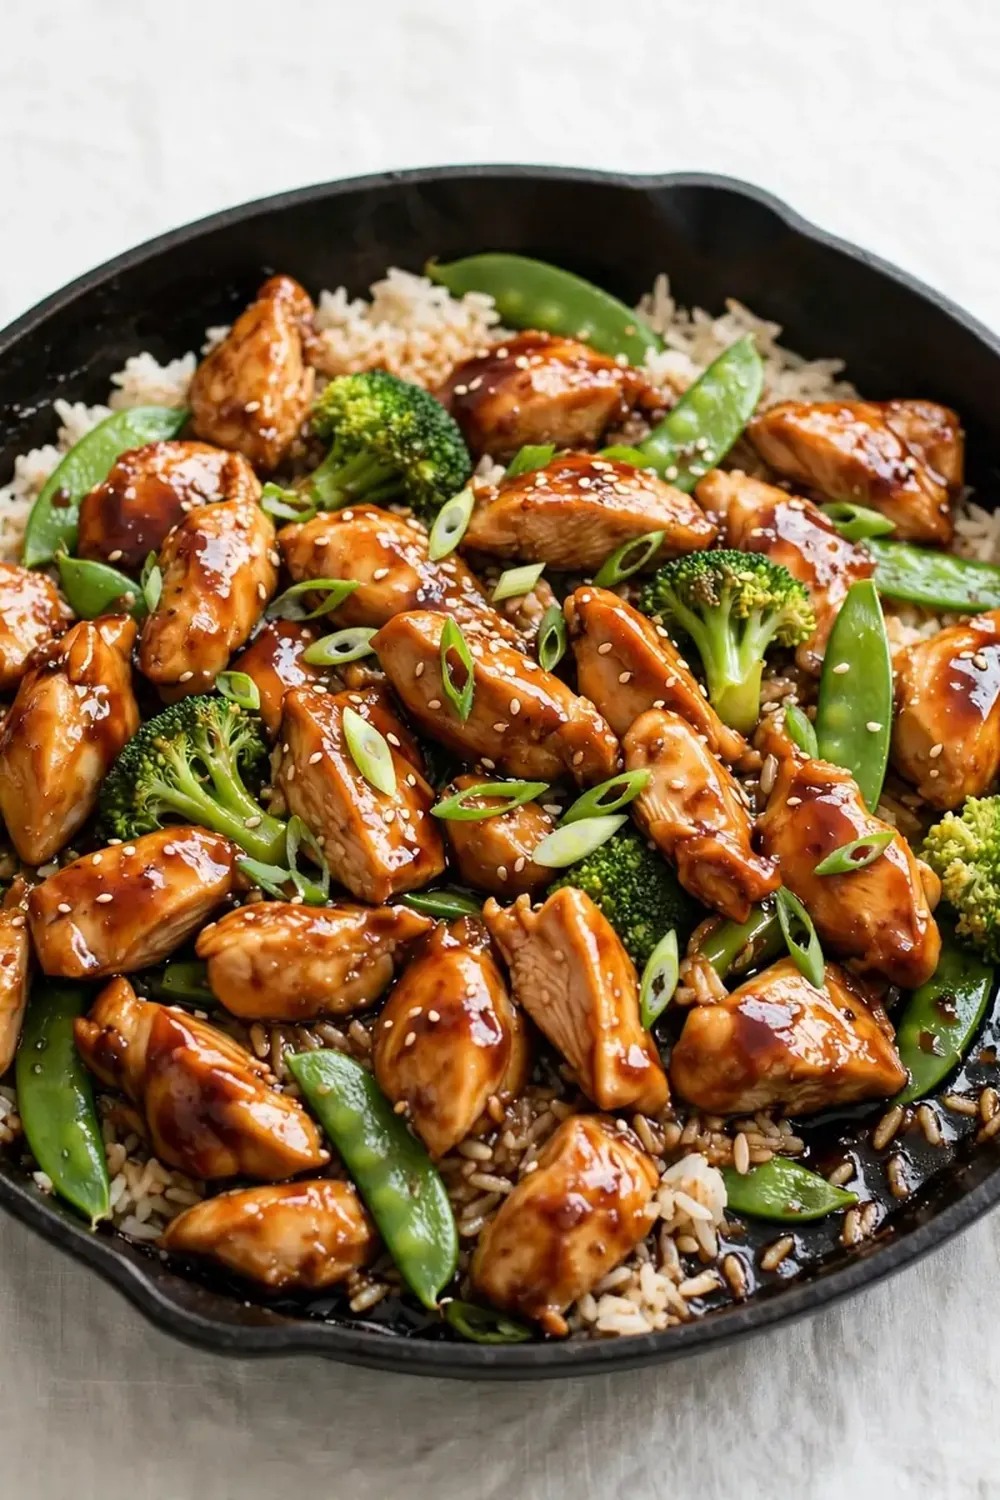
- Simmer and reduce: Lower the heat to medium and let the sauce simmer for 5-7 minutes, stirring occasionally. Watch as the liquid transforms from a thin broth into a glossy, sticky glaze that clings to the back of a spoon. The colour deepens to a rich mahogany, and the chicken absorbs the flavour completely.
- Finish and garnish: Remove the skillet from the heat. Sprinkle the sliced spring onions and toasted sesame seeds over the top. The contrast of the bright green spring onion against the dark, lacquered chicken is beautiful. Let it rest for 2 minutes before serving — the sauce will set slightly, becoming even more luscious.
Tips From My Kitchen
- Pat the chicken bone-dry before cooking: This is the single most important step for achieving a good sear. Any moisture on the surface turns to steam in the pan, which prevents browning and leaves the meat pale and steamed rather than golden and crisp. Use a few sheets of kitchen paper and press firmly.
- Let the skillet get properly hot before adding oil: A cold pan will cause the chicken to stick and stew. Test the heat by flicking a single drop of water onto the surface — if it sizzles and evaporates immediately, the pan is ready. The oil should be shimmering, not smoking.
- Do not overcrowd the pan: If you add too many chicken pieces at once, the temperature drops and the meat releases its juices, leading to a grey, watery result. Cook in batches if necessary, then return all the chicken to the pan when you add the sauce. Your patience will be rewarded with better texture.
- Taste the sauce before thickening: Everyone’s soy sauce and honey vary in saltiness and sweetness. Before adding the cornflour, dip a clean spoon into the mixture and taste it. Adjust with a pinch more honey if you prefer it sweeter, or a dash more vinegar for acidity. It is much harder to fix the sauce once it has thickened.
- Use fresh ginger, not the dried powder: Fresh ginger provides a bright, zesty warmth that is essential to teriyaki’s character. Dried ginger is more pungent and less aromatic, and it can leave a gritty texture in the sauce. Grate it on a microplane for the best results — the fibrous strands will melt into the sauce as it simmers.
Equipment You’ll Need
- Large frying pan or skillet (non-stick or cast iron works well)
- Sharp knife and cutting board
- Mixing bowls
- Wooden spoon or spatula
- Microplane or fine grater for the ginger
- Tongs for turning the chicken
Delicious Variations to Try
- Spicy Version: Add 1 teaspoon of chilli flakes or a finely chopped red chilli to the sauce before simmering. For extra heat, drizzle with sriracha or chilli oil just before serving. The sweetness of the honey balances the spice beautifully.
- Vegetarian/Vegan Option: Replace the chicken with 400 g of firm tofu, pressed and cubed, or use thick slices of portobello mushrooms. Swap the chicken stock for vegetable stock. The tofu will absorb the sauce wonderfully if you let it simmer for an extra few minutes.
- Different Protein: This teriyaki sauce works just as well with beef strips or turkey thigh pieces. If using beef, cook it for a shorter time — about 2 minutes per side — to keep it tender. For a lighter option, try it with large peeled prawns, cooking them for only 2-3 minutes total.
What to Serve With Quick Teriyaki Chicken Skillet
- Fluffy steamed jasmine rice or sticky sushi rice to soak up every drop of the sauce
- A simple side of steamed or stir-fried greens, such as pak choi or tenderstem broccoli
- A crisp cucumber and sesame salad with a light rice vinegar dressing
- For a heartier meal, serve alongside Cozy Weekend Project Sheet Pan Chicken Gnocchi And Tomatoes for a wonderful contrast in textures
Still hungry for ideas? You might also love Creamy Garlic Parmesan Chicken Skillet, Creamy Garlic Parmesan Chicken Skillet from our sister kitchens.
Frequently Asked Questions
Quick Teriyaki Chicken Skillet
Ingredients
Method
- Prepare the chicken: Pat the chicken thighs dry with kitchen paper, then slice them into bite-sized chunks, about 3 cm each. You want them uniform so they cook evenly. The raw chicken should feel cool and slightly damp in your hands, but the paper removes excess moisture that would stop it browning.
- Mix the teriyaki sauce: In a small bowl, whisk together the soy sauce, honey, rice vinegar, minced garlic, grated ginger, cornflour, and chicken stock. Whisk until the cornflour dissolves completely — you should see no white specks left. The liquid will be a translucent, amber-brown colour with the honey swirling through it.
- Heat the skillet: Place your large frying pan or skillet over a medium-high heat and add the vegetable oil. Wait until the oil shimmers and a small piece of onion sizzles immediately when dropped in. This takes about 2 minutes.
- Sear the chicken: Add the chicken pieces in a single layer — do not crowd the pan, cook in two batches if needed. Leave them undisturbed for 3 minutes. You will hear a steady, satisfying hiss as the meat hits the hot oil. The underside should turn a deep golden brown with crispy edges before you flip them.
- Brown all sides: Turn each piece with tongs and cook for another 3 minutes. The chicken should feel firm to the touch and have a rich, roasted aroma filling your kitchen. The surfaces will be caramelised in patches, smelling nutty and savoury.
- Add the sauce: Pour the teriyaki mixture into the skillet around the chicken, not directly over it, to avoid splashing. Stir gently to coat every piece. The sauce will immediately start to bubble and thicken, releasing a sweet-savoury steam that smells intensely of ginger and garlic.
- Simmer and reduce: Lower the heat to medium and let the sauce simmer for 5-7 minutes, stirring occasionally. Watch as the liquid transforms from a thin broth into a glossy, sticky glaze that clings to the back of a spoon. The colour deepens to a rich mahogany, and the chicken absorbs the flavour completely.
- Finish and garnish: Remove the skillet from the heat. Sprinkle the sliced spring onions and toasted sesame seeds over the top. The contrast of the bright green spring onion against the dark, lacquered chicken is beautiful. Let it rest for 2 minutes before serving — the sauce will set slightly, becoming even more luscious.
Notes
I truly hope this Quick Teriyaki Chicken Skillet becomes a cherished part of your cosy weekend rotation. It is one of those dishes that feels both simple and special, filling your home with the kind of warmth that lingers long after the plates are cleared. Friends always ask me for this recipe after trying it at dinner parties, and I love seeing how each person adds their own little twist. If you make it, I would love to hear how it turned out for you — drop a comment below and let me know what you served alongside it, or if you tried one of the variations. Happy cooking, and enjoy every sticky, savoury bite.